Refreshing e-ink displays on Windows
One of the pain points with e-ink/e-paper displays is having to manually refresh the screen to clear ghosting. While e-ink monitors like the Boox Mira and Dasung Paperlike 253 all have a dedicated hardware refresh button, it’s inconvenient to have to reach for your monitor(s) all day. Although this problem is a relatively simple software fix, either by using a manufacturer’s (janky) client application, or by using scripts to communicate over serial, it becomes difficult when using locked-down Windows device like my work machine.
Fortunately, it’s possible to set up a pseudo-shortcut on Windows which approximates a refresh.
What does refreshing an e-ink display actually mean?
Since this isn’t a post on how e-ink/e-paper technology works, I’ll be brief.
Whenever you use an e-ink display ghosting occurs. This is where a faint outline of previously displayed text/images sticks around. After a while, the ectoplasm builds up and you’re left with an ugly, spectral mess. To clear this, you can briefly turn the display black and then redraw the contents of the screen.
Blanking your screen on Windows
By far, the easiest way to turn your display(s) black for split second is using an AutoHotkey script like this one. But in my case, I need a built-in Windows utility to do the same job.
As it turns out, the built-in screensaver is pretty good for this! Thanks to a helpful Superuser discussion I learnt the following command enables the screensaver (without locking the session).
cmd /c scrnsave.scr /s
Provided the current screensaver isn’t set to an image or bright colour, running this command is an effective way of turning all connected displays black. But the gotcha here is that you have to move the mouse or press a key to return to your work.
Usability wise, the real issue is not having a convenient shortcut. Having to switch to a console window every time you need to refresh the screen is about as annoying as pressing a button on the device.
Enter the pseudo-shortcut
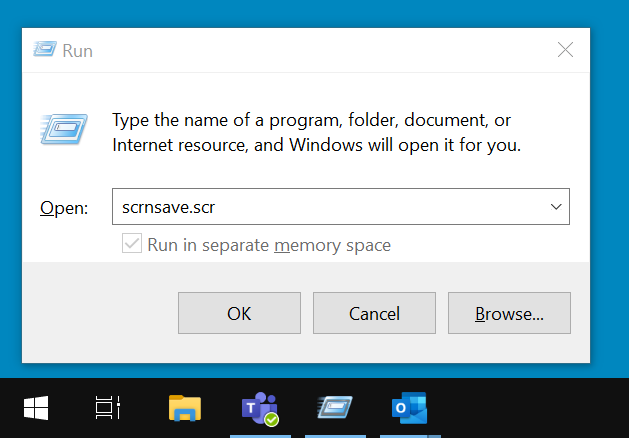
At this point, I realised that I could bypass the console altogether by using the Run command window. Pressing Win + R opens the Run dialog which can be used to start the scrnsave.scr command.
Note that only the scrnsave.scr part of the command is necessary. Hitting Enter will then turn on the screensaver and hitting it again will disable it.
What’s more, the Run dialog remembers your last command. So if you’re like me and don’t use Run for much else, you’ll never need to retype the command after the first time. This means the shortcut Win + R Enter Enter is now always available.
While far from a perfect solution, I’ve been quite happy with this hack. It works well enough most of the time and has the added benefit of working with any e-ink display, regardless of manufacturer.
